Overview
To manage users and groups, go to the ‘Team’ tab in the left side menu.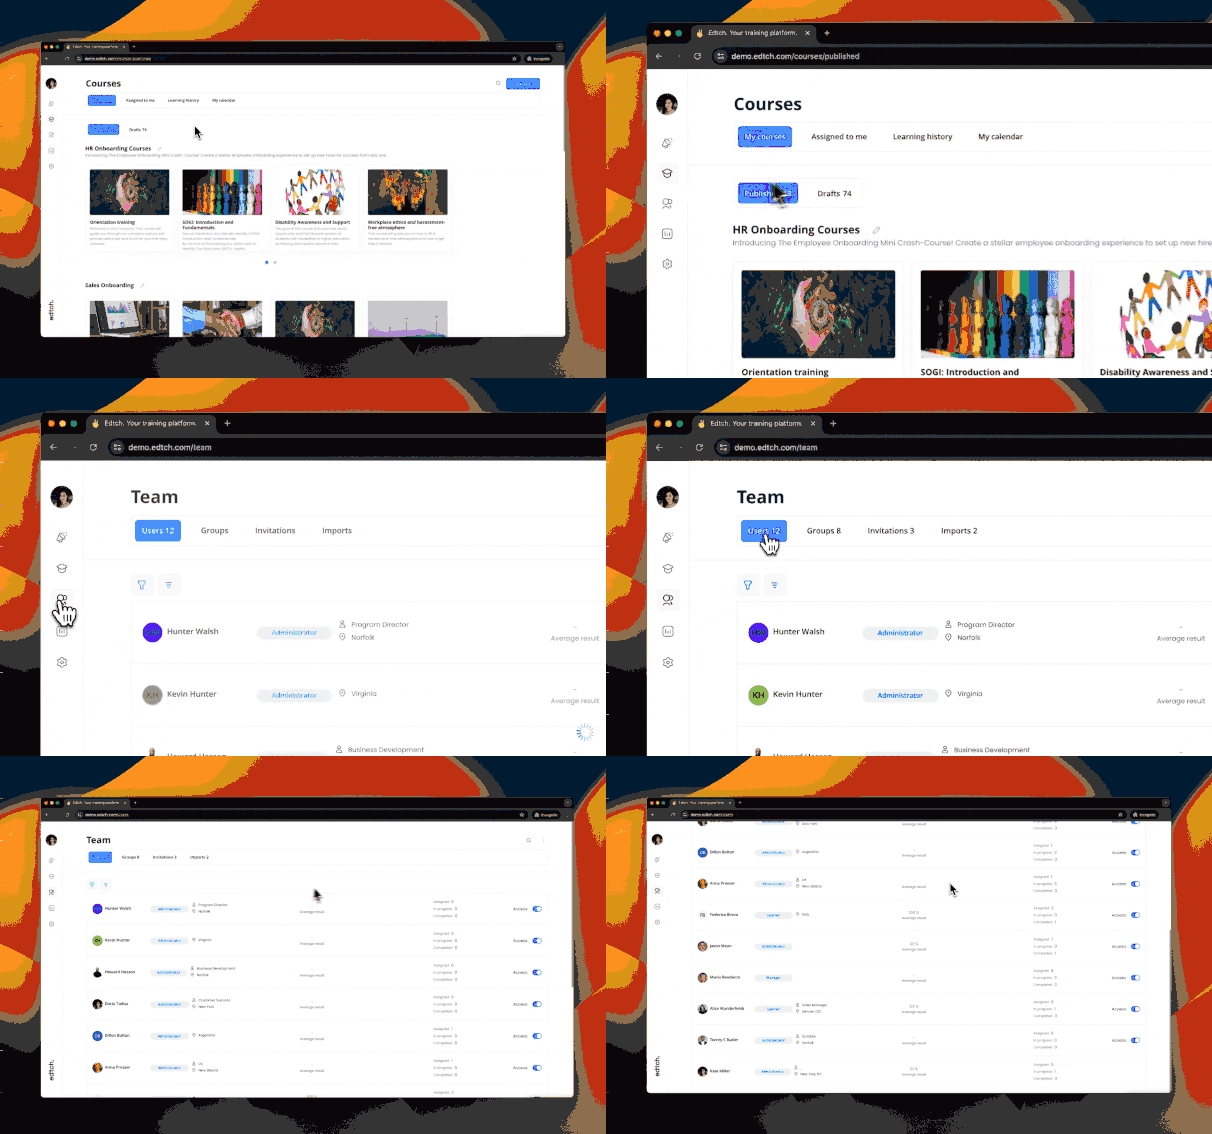
Invite New Learners
You need to create a separate Konstantly account for every learner so that you can assign courses to them and track their progress. You can create accounts manually, or you can send invitations to learners that will enable them to create their Konstantly accounts.Sending Invitations
To send an invitation, log in to Konstantly, open the Team tab, and click Invite.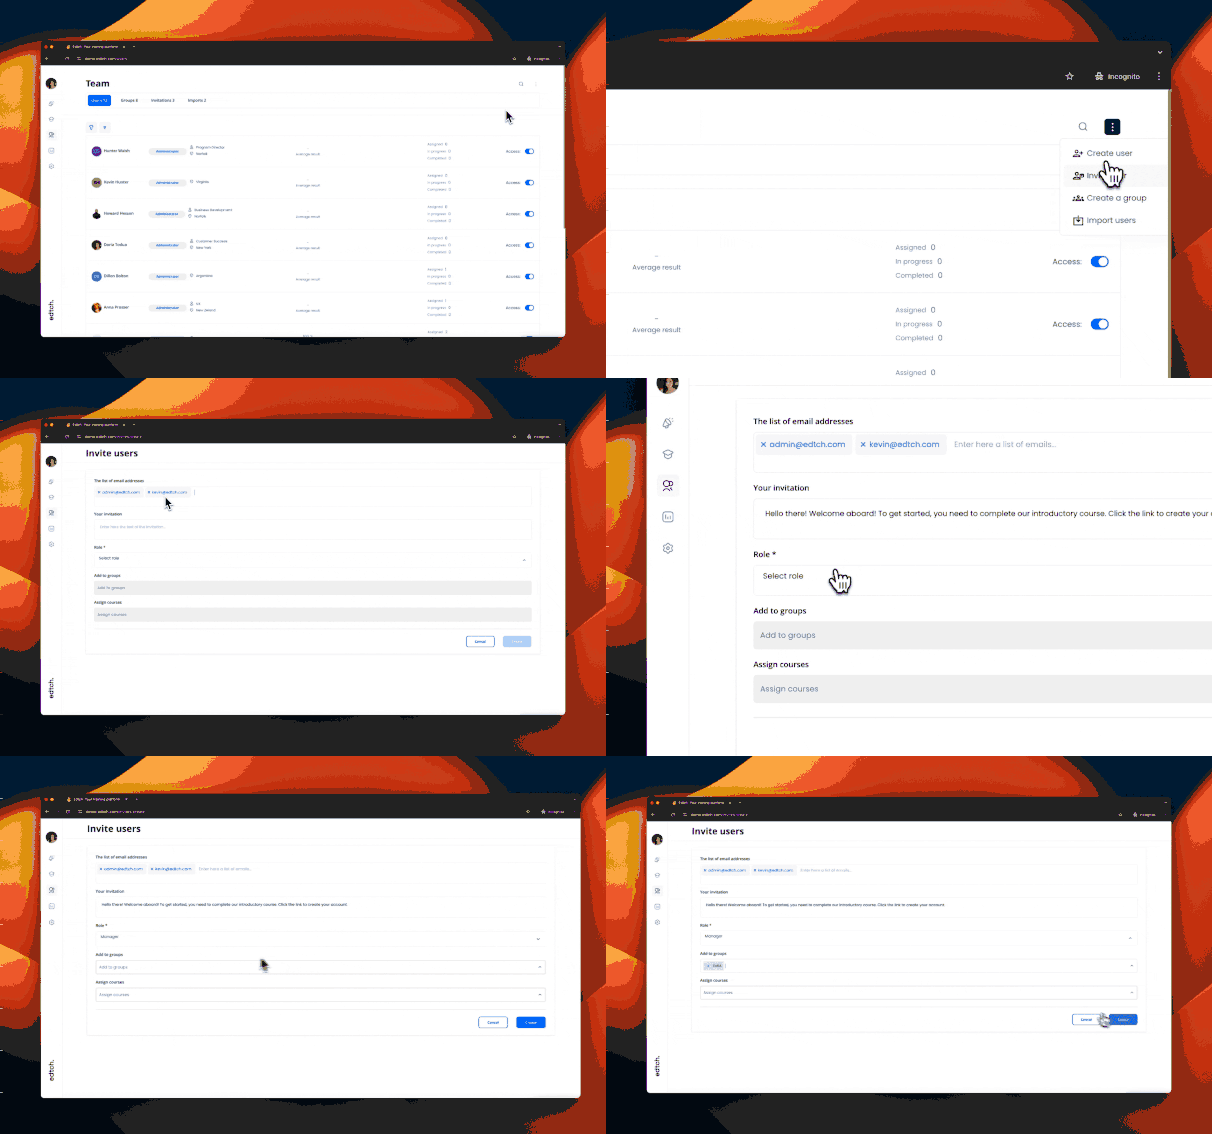
- Customize your invitation with a welcome text. No need to wax poetic, but it is nice to explain what the invitation is for, and why the recipient needs to accept it.
- Choose a group the learner will automatically be assigned to once they accept the invitation.
- Choose a course the learner will automatically be assigned once they accept the invitation, and, optionally, set the due date.
Managing Invitations
Once the invitation has been sent, and until it is accepted, you can see it by opening the Team tab and clicking on Invitations. For every pending invitation, you can:- Resend the email
- Grab the invitation link
- Cancel the invitation
Editing User Profile Fields
As an administrator, you have access not only to creating users, but also to editing data in user profiles. To make changes or add new information to a user’s profile, click on their name or photo in the list of users in the “Team” tab.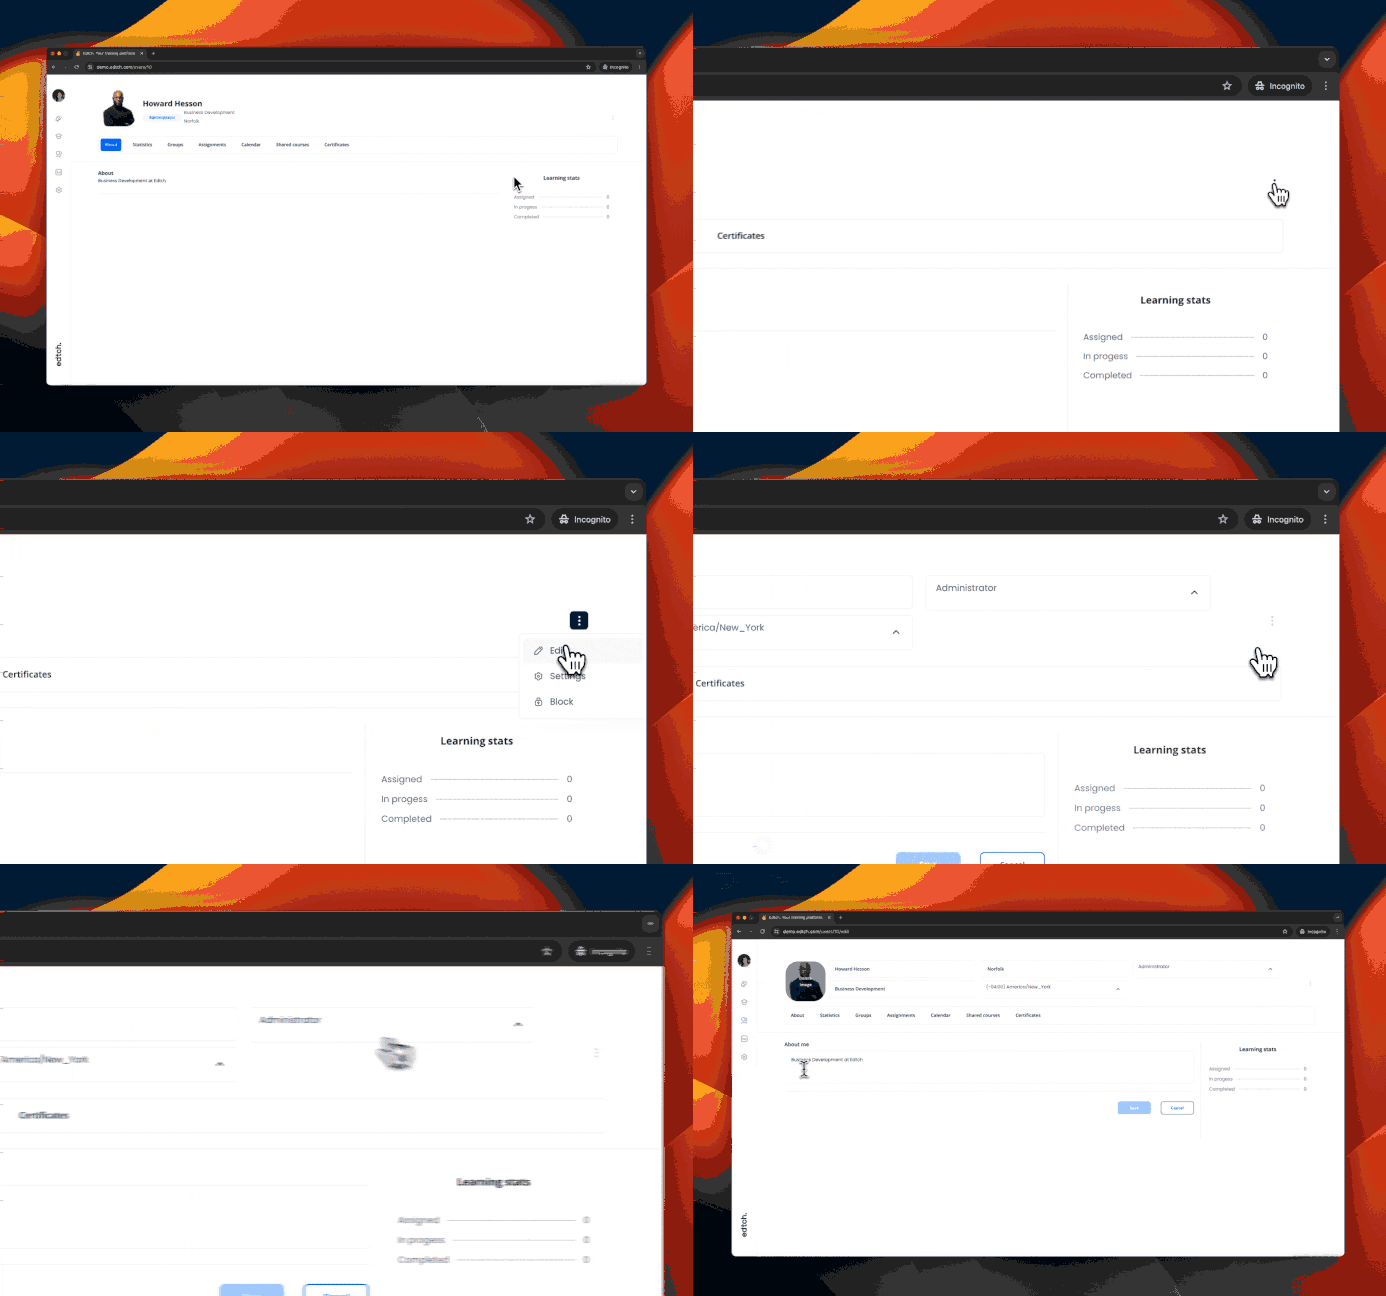
Editable Fields
The following fields will become available for editing:- Name
- Profile photo
- Position and company
- City
- Time zone
- Role
- Additional attribute fields if they exist
- “About Me” field
Don’t forget to press the “Save” button to make changes to the profile.
Additional Settings
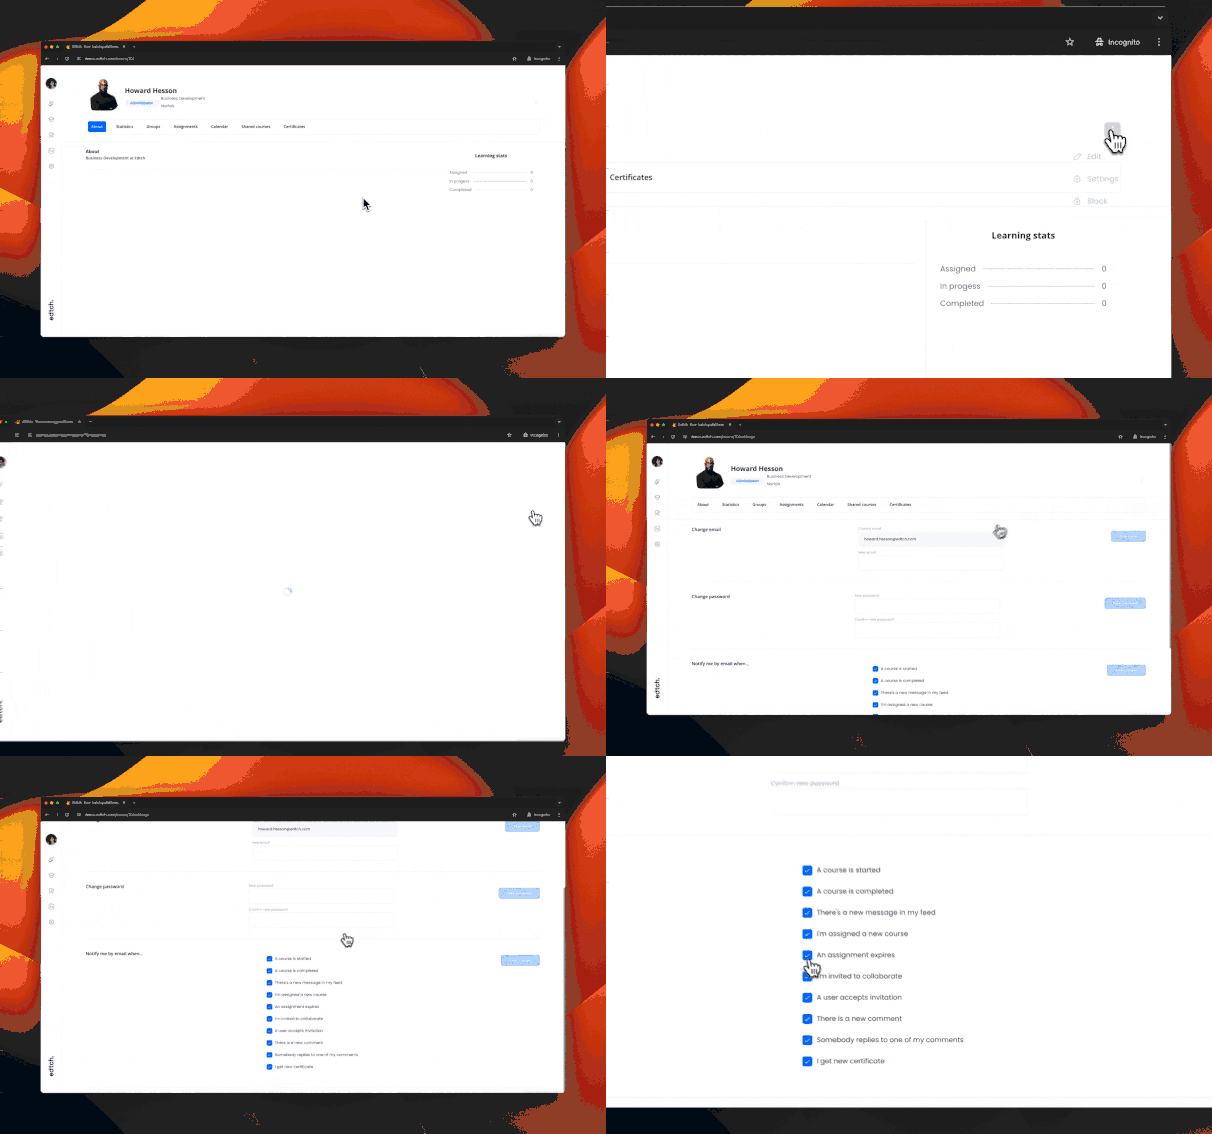
- Change notification settings
- Change the user’s email address
Group Hierarchy
View, create, and manage groups in the “Groups” tab under “Team”.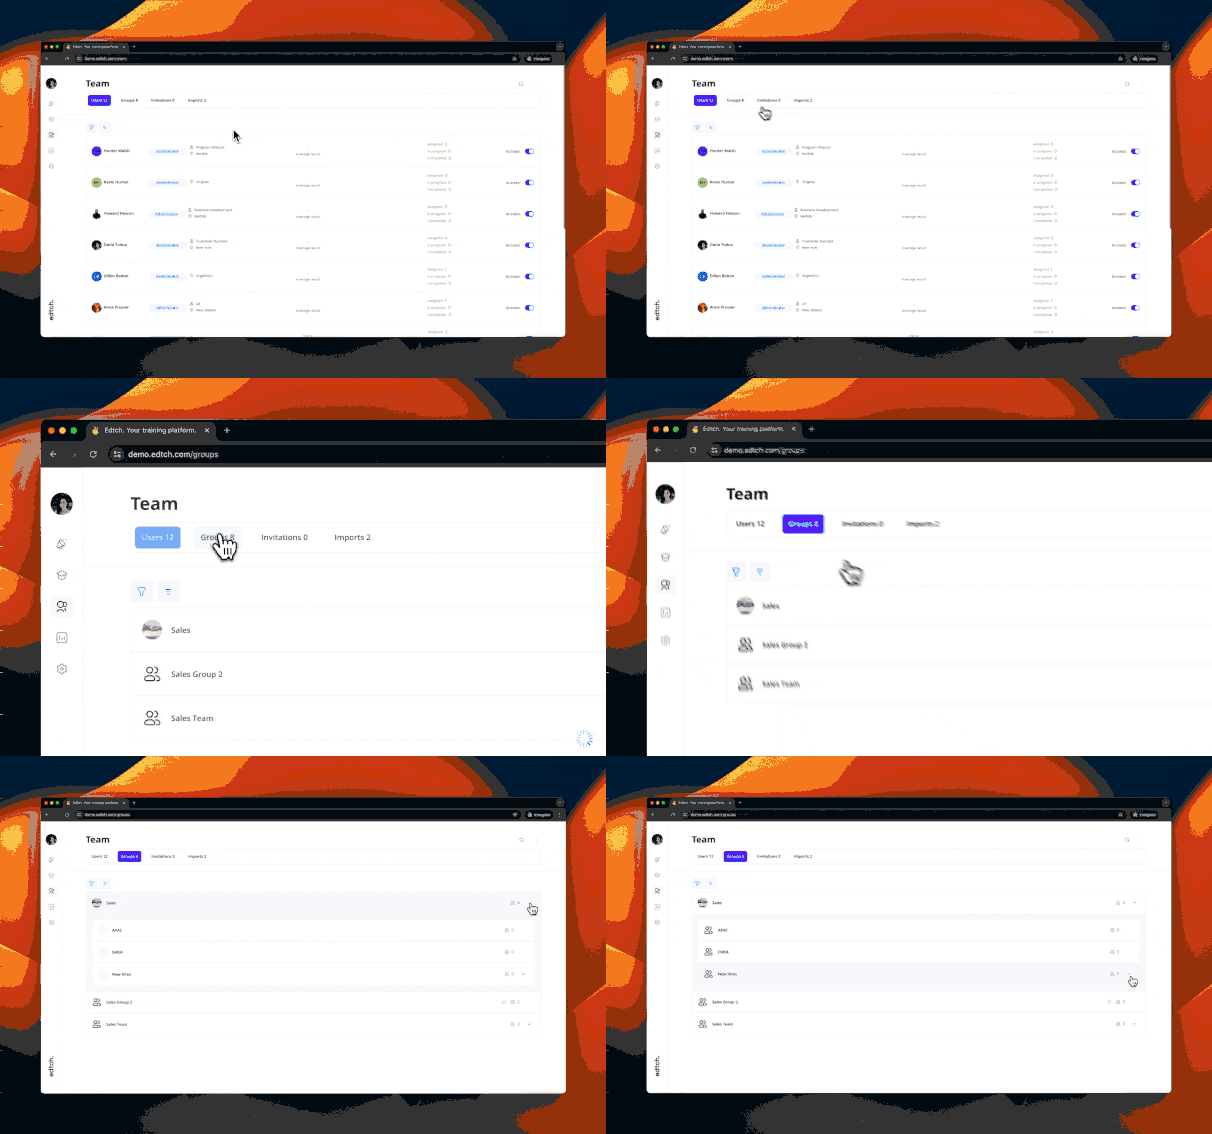
Creating Groups
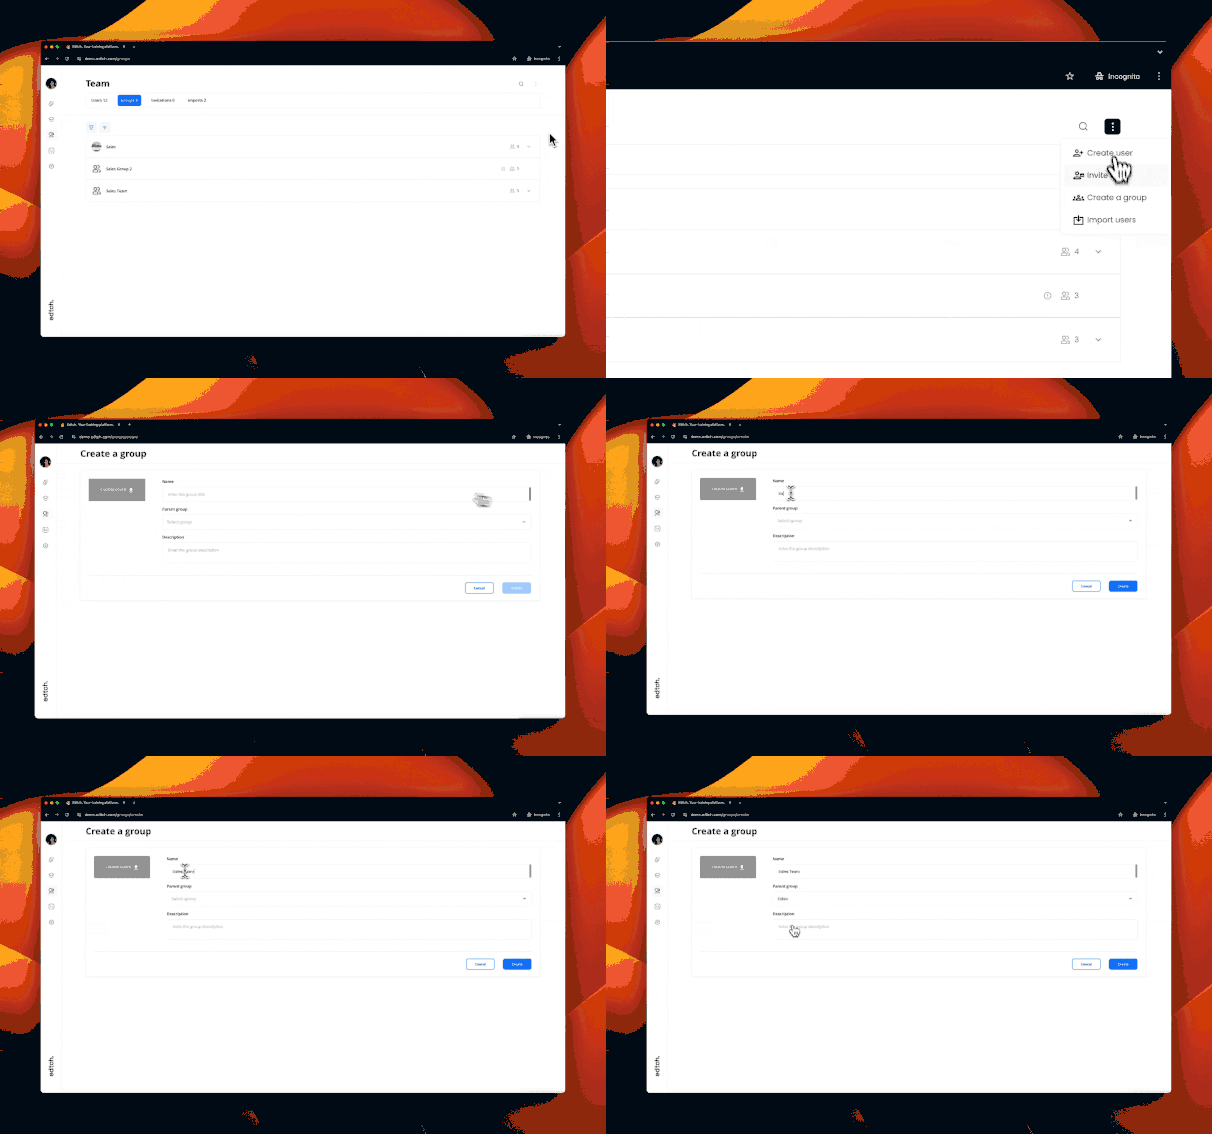
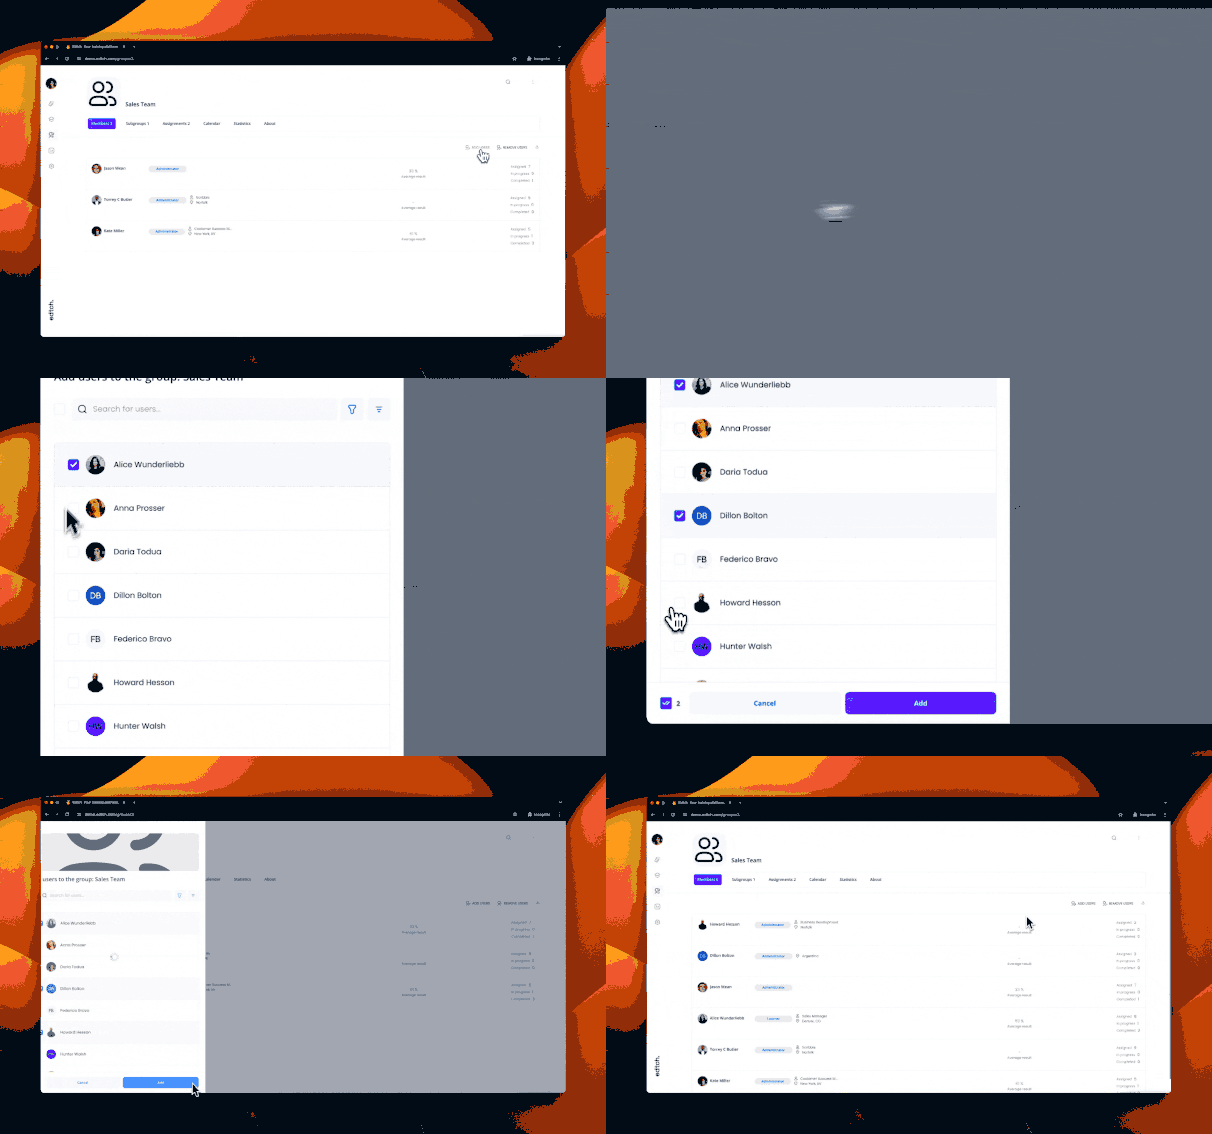
Add Learners to Groups
Best Practices
Invitation Management
- Use bulk invitations: Send multiple invitations at once by adding multiple email addresses
- Provide context: Include welcome text explaining why they’re receiving the invitation
- Pre-assign to groups: Automatically assign users to appropriate groups upon acceptance
- Set deadlines: Assign courses with due dates directly in the invitation
- Monitor pending invitations: Regularly check and resend invitations that haven’t been accepted
User Profile Management
- Keep profiles current: Regularly update user information to ensure accurate reporting
- Use custom fields: Leverage custom fields to track additional user attributes
- Assign appropriate roles: Use the role management system to control access
- Review time zones: Ensure time zones are set correctly for accurate deadline tracking
Group Structure
- Mirror organization structure: Create groups that reflect your actual company hierarchy
- Use meaningful names: Name groups clearly to make course assignment easier
- Plan hierarchy first: Design your group structure before creating groups
- Keep it simple: Don’t over-complicate the hierarchy; 2-3 levels is usually sufficient
- Document structure: Maintain documentation of your group hierarchy and purpose
User and Group Hygiene
- Regular audits: Periodically review users and groups to remove obsolete ones
- Consolidate groups: Merge similar groups to simplify management
- Archive inactive users: Use role changes or deactivation for users who no longer need access
- Standardize naming: Use consistent naming conventions for groups and user fields
Common Workflows
Onboarding New Employees
- Send invitation with welcome message
- Auto-assign to department group
- Auto-assign to onboarding course with deadline
- Monitor invitation acceptance
- Review profile completion
Department Restructuring
- Create new group hierarchy
- Move users to new groups
- Update course assignments
- Archive old groups
Bulk User Management
- Export user list
- Make updates in spreadsheet
- Use API or bulk tools to update
- Verify changes in Team tab